This article explains how library administrators can configure relations in AODocs
Relations lets you create links between documents (items) that are related to each other.
Related items can be of the same or a different document class within a given library. They appear in the document’s Properties tab. Learn more: Open related items.
Note: You can customize where relations are displayed on the document page. For example, a relation may be the parent task of a sub-task and it may make sense to display the related item at the very top of the screen, leaving other relations in less prominent positions. To do this, contact the AODocs Support team by email at mailto:support@aodocs.com" or open a ticket.
As a library administrator, you can:
Automatically generated table of contents
Set up relations between different document classes
1. Open the library administration and select Relations.
2. Click Add new value.
3. Enter a name for your new relation.
4. Press Enter.
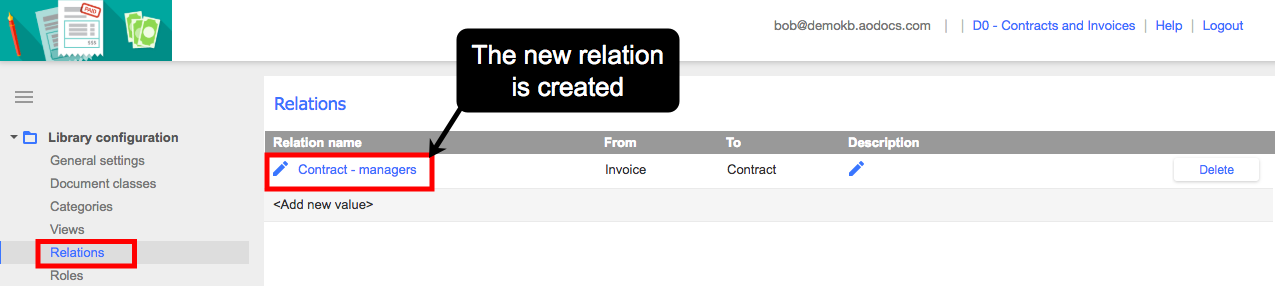
5. Click the name of the relation to open the relation configuration panel.
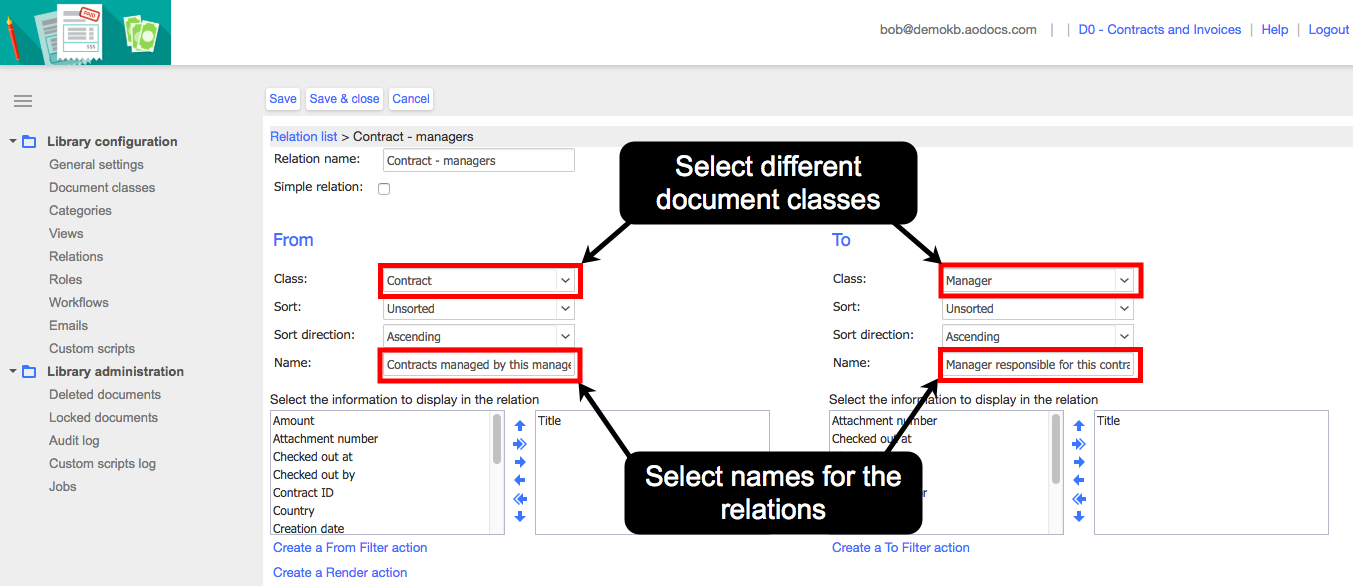
The relation configuration panel has columns named From and To. The columns let you define what is displayed in the relations table for each document class of the relation. The relations table appears in the Properties tab of documents that can be related.
Note: Switching the From and To columns doesn't affect your relation. The relation works identically in both directions.
6. Select the required document classes in the Class fields.
7. Define the names of the relations that will be displayed to users in the Name fields.
Note: By default, when you create a relation the first document class in the library is used for the Class and Name fields in both the From and To columns.
Note: A message appears if the relation you have defined won't be displayed automatically in the document page. Learn more: Configure how relations are displayed to end users.
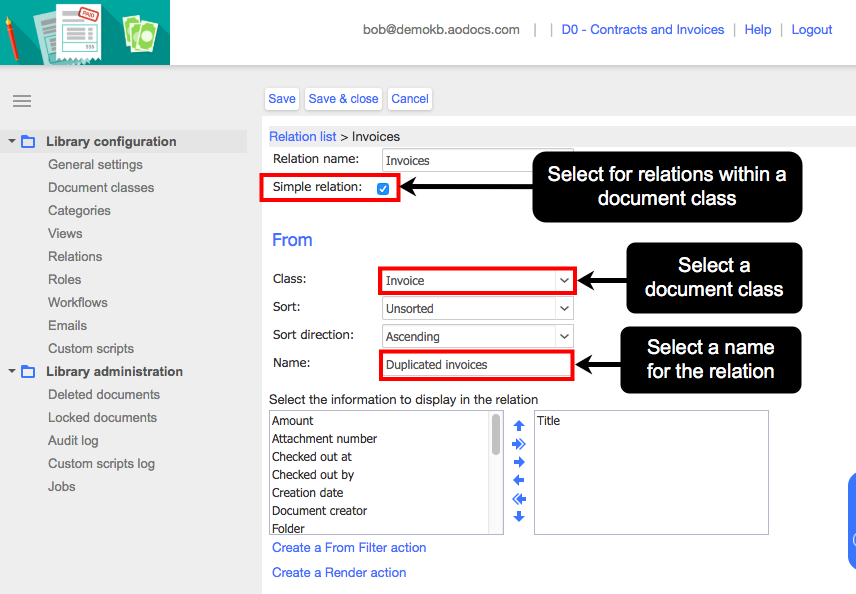
Set up relations within a single document class
1. Add a new relation under Relations in the library administration interface.
2. Click the name of the relation to open the relation configuration panel.
3. Select the Simple relation checkbox in the relation configuration panel.
4. Select a document class in the Class field.
5. Define the name of the relation that will be displayed to users in the Name field.
Configure how relations are displayed to end users
Note: You can define which relations appear in the end user interface and their order. Learn more: Select relations to display and define their order.
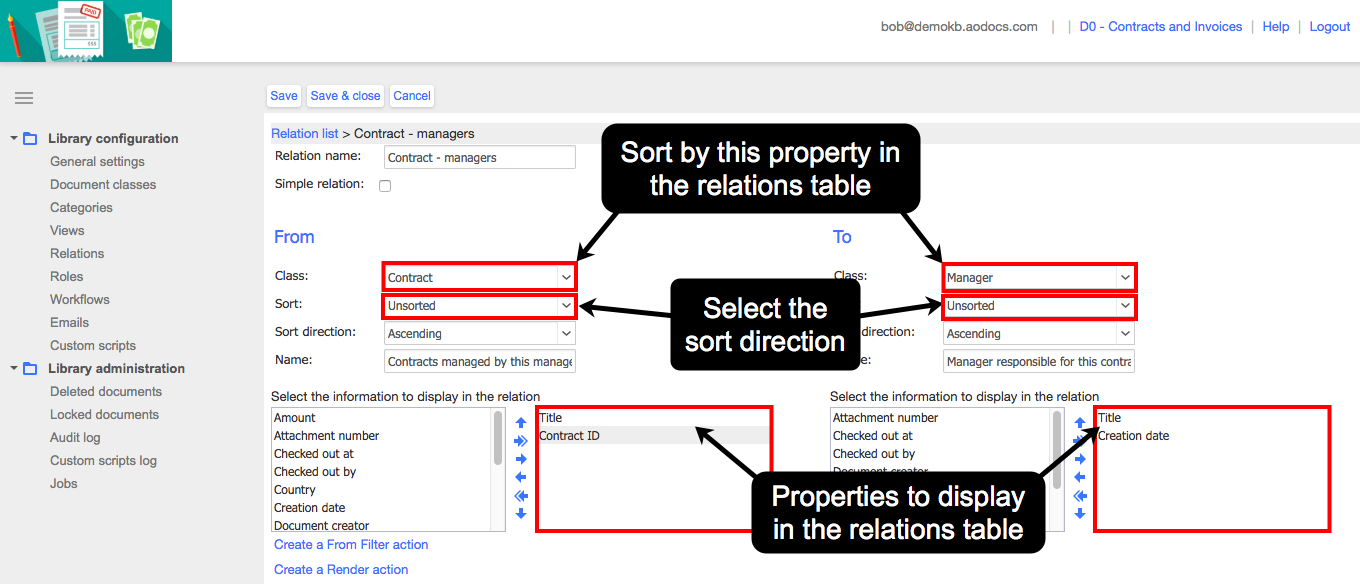
1. In the Sort field, select the property used to sort the the relations in the relations table. The default is Unsorted.
2. Define whether to display the relations in Ascending or Descending order.
3. Under Select the information to display in the relation, select the properties you want to display in the relations table for each document class in the relation.
- To add a property to display, select it in the left box and click the right arrow.
- To remove a property to display, select it in the right box and click the left arrow.
- To change the order of the displayed properties, use the up and down arrows.
Note:
– If you selected Simple relation, only one list of properties appears.
– Table properties and table column properties aren't available for selection.
4. Save your changes.
The relations appear in the Properties tab of your documents. Learn more: Open related items.
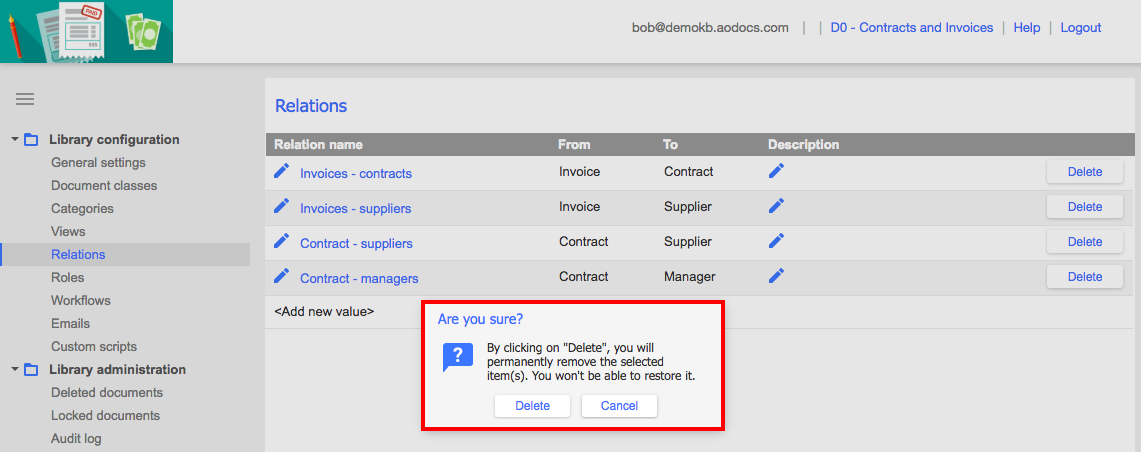
Delete relations
1. In the list of relations, click Delete to the right of the relation you want to delete.
2. A confirmation dialog opens. Click Delete.